
Kolab是一个开源的基于web的群件软件应用程序,为电子邮件服务器、目录服务、web服务、日历、任务、地址簿等提供解决方案。Kolab支持多种客户端,包括outlook、KDE Contact、Thunderbird和Roundcube。Kolab提供用户友好且易于使用的web界面,可用于添加、修改和删除用户、域、共享文件夹等.。。
Kolab具有许多功能,其中一些功能如下:
为outlook、web和KDE等混合客户端环境提供支持。
使用IMAP和POP3发送电子邮件,使用LDAP存储配置数据。
为共享联系人和日历提供支持。
完全支持CardDAV和WebDAV、ActiveSync和CalDAV的服务器端。
必要条件
运行Ubuntu 16.04的服务器。
在您的服务器上设置了具有sudo权限的非root用户。
服务器上的静态IP 192.168.0.190设置。
入门
在开始之前,您需要在系统中设置完全限定域名或主机名。您可以通过编辑/etc/hosts和/etc/hostname文件来完成此操作:
sudo nano /etc/hosts在文件末尾添加IP地址和主机名:
192.168.0.190 mail.kolab.com mail保存并关闭文件,然后编辑/etc/hostname文件:
sudo nano /etc/hostname添加以下行:
mail.kolab.com完成后保存文件,然后重新启动系统以应用所有更改。
安装MariaDB
在安装Kolab之前,您需要在服务器上安装最新版本的MariaDB。默认情况下,MariaDB在Ubuntu 16.04默认存储库中不可用。因此,首先使用以下命令下载MariaDB的APT密钥:
sudo apt-key adv --recv-keys --keyserver hkp://keyserver.ubuntu.com:80 0xF1656F24C74CD1D8接下来,使用以下命令添加Maria DB存储库:
sudo add-apt-repository 'deb [arch=amd64,i386,ppc64el] http://mirror.jmu.edu/pub/mariadb/repo/10.1/ubuntu xenial main'接下来,使用以下命令更新存储库并安装MariaDB:
sudo apt-get update -y
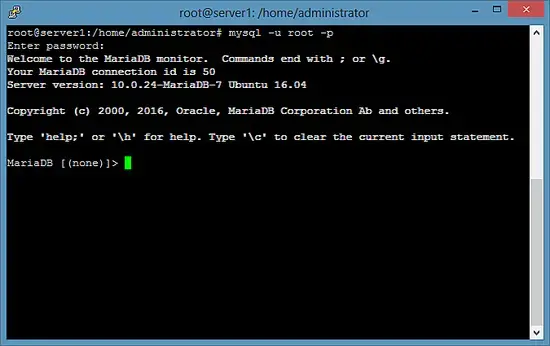
sudo apt-get install mariadb-server -y安装MariaDB后,启动MariaDB服务,并使用以下命令使其在启动时启动:
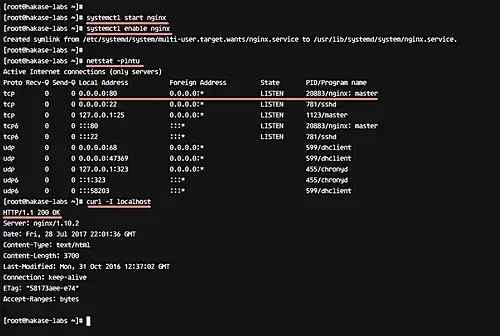
sudo systemctl start mysql
sudo systemctl enable mysql
接下来,通过运行以下脚本来保护MariaDB的安装:
sudo mysql_secure_installation请回答以下所有问题:
Enter current password for root (enter for none):
Change the root password? [Y/n] n
Remove anonymous users? [Y/n] Y
Disallow root login remotely? [Y/n] Y
Remove test database and access to it? [Y/n] Y
Reload privilege tables now? [Y/n] Y
MariaDB安全后,您可以继续下一步。
安装Kolab
默认情况下,Kolab在Ubuntu 16.04默认存储库中不可用。因此,您需要将Kolab存储库添加到APT中。您可以通过编辑/etc/APT/sources.list文件来完成此操作:
sudo nano /etc/apt/sources.list在文件末尾添加以下行:
deb http://obs.kolabsys.com/repositories/Kolab:/16/Ubuntu_16.04/ ./
deb-src http://obs.kolabsys.com/repositories/Kolab:/16/Ubuntu_16.04/ ./
保存并关闭文件,然后导入用于对包进行签名的GPG密钥:
wget -q -O- https://ssl.kolabsys.com/community.asc | sudo apt-key add -接下来,您需要确保Kolab软件包优先于Ubuntu软件包。您可以通过创建/etc/apt/preferences.d/kolab文件来实现这一点:
sudo nano /etc/apt/preferences.d/kolab添加以下行:
Package: *
Pin: origin obs.kolabsys.com
Pin-Priority: 501
使用以下命令保存文件并更新存储库元数据:
sudo apt-get update -y最后,只需运行以下命令即可安装Kolab:
sudo apt-get install kolab -y配置Kolab
安装Kolab后,您需要设置Kolab群件。您可以通过运行以下命令来完成此操作:
sudo setup-kolab在Kolab设置过程中,您将被问及以下问题,请按照随附的说明进行操作。
#Please supply a password for the LDAP administrator user 'admin', used to login to the graphical console of 389 Directory server.

Administrator password [JAOw_2oIhlezXlK]:
Confirm Administrator password:

#Please supply a password for the LDAP Directory Manager user, which is the administrator user you will be using to at least initially log in to the Web
#Admin, and that Kolab uses to perform administrative tasks.

Directory Manager password [QXML8Suxv-YTUFr]:
Confirm Directory Manager password:

#Please choose the system user and group the service should use to run under. These should be existing, unprivileged, local system POSIX accounts with no shell.

User [dirsrv]:
Group [dirsrv]:

#This setup procedure plans to set up Kolab Groupware for the following domain name space. This domain name is obtained from the reverse DNS entry on your
#network interface. Please confirm this is the appropriate domain name space.

kolab.com [Y/n]: Y

#The standard root dn we composed for you follows. Please confirm this is the root dn you wish to use.

dc=kolab,dc=com [Y/n]: Y

#Setup is now going to set up the 389 Directory Server. This may take a little while (during which period there is no output and no progress indication).

Created symlink from /etc/systemd/system/multi-user.target.wants/dirsrv.target to /lib/systemd/system/dirsrv.target.

#Please supply a Cyrus Administrator password. This password is used by Kolab to execute administrative tasks in Cyrus IMAP. You may also need the password
#yourself to troubleshoot Cyrus IMAP and/or perform other administrative tasks against Cyrus IMAP directly.

Cyrus Administrator password [h3IbKvhbKGUwhy5]:
Confirm Cyrus Administrator password:

#Please supply a Kolab Service account password. This account is used by various services such as Postfix, and Roundcube, as anonymous binds to the LDAP server
#will not be allowed.

Kolab Service password [KhHTzhSYh4w11Vw]:
Confirm Kolab Service password:

What MySQL server are we setting up?
 - 1: Existing MySQL server (with root password already set).
 - 2: New MySQL server (needs to be initialized).
Choice:  - 1: Existing MySQL server (with root password already set).
 - 2: New MySQL server (needs to be initialized).
Choice:  - 1: Existing MySQL server (with root password already set).
 - 2: New MySQL server (needs to be initialized).
Choice: 2

#Please supply the root password for MySQL, so we can set up user accounts for other components that use MySQL.

MySQL root password:

#Please supply a password for the MySQL user 'kolab'. This password will be used by Kolab services, such as the Web Administration Panel.

MySQL kolab password [2-Zz7j_AjGI8QF0]:
Confirm MySQL kolab password:

#Please supply the timezone PHP should be using. You have to use a Continent or Country / City locality name like 'Europe/Berlin', but not just 'CEST'.

Timezone ID [UTC]: Asia/Kolkata

#Please supply a password for the MySQL user 'roundcube'. This password will be used by the Roundcube webmail interface.

MySQL roundcube password [OVwJoKktzbOMAys]:
Confirm MySQL roundcube password:
Kolab设置完成后,您可以继续访问Kolab web界面。
Kolab Web界面
打开web浏览器并键入URLhttp://mail.kolab.com/kolab-webadmin或http://192.168.0.190/kolab-webadmin.您将被重定向到Kolab登录页面,如下所示:
![图片[1]_在Ubuntu 16.04 LTS上安装和配置Kolab群件_马特资源网](http://www.iamlz.com/wp-content/uploads/2025/03/1743408269451.png)
提供用户名cn=目录管理器和您在上述步骤中设置的密码。然后单击登录按钮。您应该看到以下屏幕:
![图片[2]_在Ubuntu 16.04 LTS上安装和配置Kolab群件_马特资源网](http://www.iamlz.com/wp-content/uploads/2025/03/1743408295102.png)
接下来,点击Web界面中的用户图标,创建一个邮件用户,如下所示:
![图片[3]_在Ubuntu 16.04 LTS上安装和配置Kolab群件_马特资源网](http://www.iamlz.com/wp-content/uploads/2025/03/1743408311075.png)
接下来,单击联系人选项卡以验证用户id:
![图片[4]_在Ubuntu 16.04 LTS上安装和配置Kolab群件_马特资源网](http://www.iamlz.com/wp-content/uploads/2025/03/1743408330651.png)
接下来,单击“系统”选项卡设置电子邮件用户密码:
![图片[5]_在Ubuntu 16.04 LTS上安装和配置Kolab群件_马特资源网](http://www.iamlz.com/wp-content/uploads/2025/03/1743408352040.png)
接下来,单击“配置”选项卡为用户设置电子邮件配额:
![图片[6]_在Ubuntu 16.04 LTS上安装和配置Kolab群件_马特资源网](http://www.iamlz.com/wp-content/uploads/2025/03/1743408368062.png)
完成后,单击Submit按钮保存所有配置。
访问Roundcube Webmail
现在,您的邮件用户已创建,是时候通过Rouncube webmail访问您的邮件了。
打开web浏览器并键入URL http://mail.kolab.com/roundcubemail.您应该看到以下屏幕:
![图片[7]_在Ubuntu 16.04 LTS上安装和配置Kolab群件_马特资源网](http://www.iamlz.com/wp-content/uploads/2025/03/1743408401570.png)
提供用户名作为您在上述步骤中设置的主要电子邮件id和密码。然后单击登录按钮。您应该在以下屏幕中看到Roundcube web界面:
![图片[8]_在Ubuntu 16.04 LTS上安装和配置Kolab群件_马特资源网](http://www.iamlz.com/wp-content/uploads/2025/03/1743408417823.png)
使用此界面,您可以轻松访问和发送电子邮件,管理地址簿、日历和任务。
祝贺您已在Ubuntu 16.04服务器上成功安装了Kolab群件。您现在可以轻松发送和接收电子邮件,管理联系人、任务和地址簿。

暂无评论内容